Lightshot Screenshot Tool – Ultimate Detailed Guide (Features, Setup, Security & Alternatives)
Overview of Lightshot
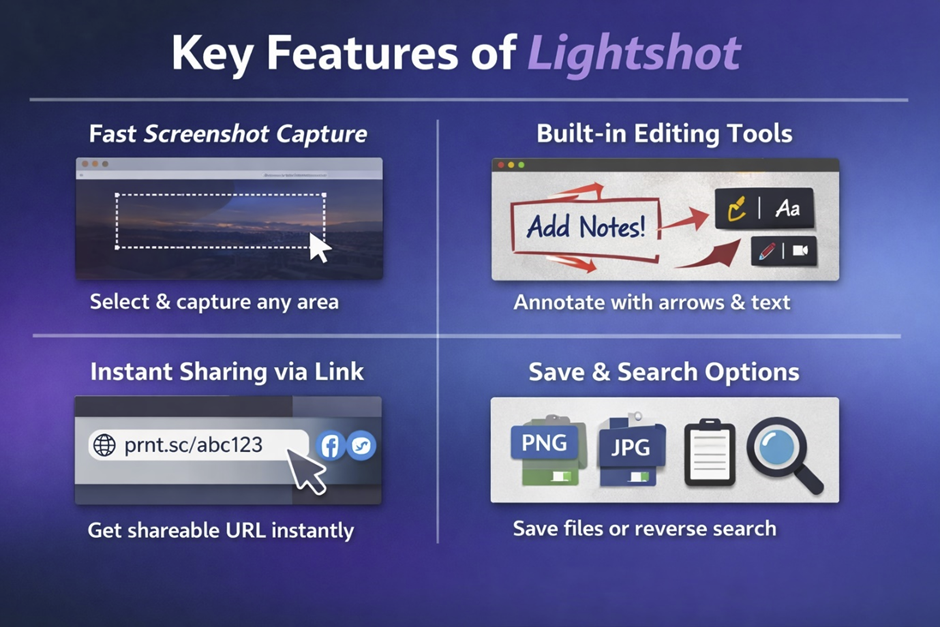
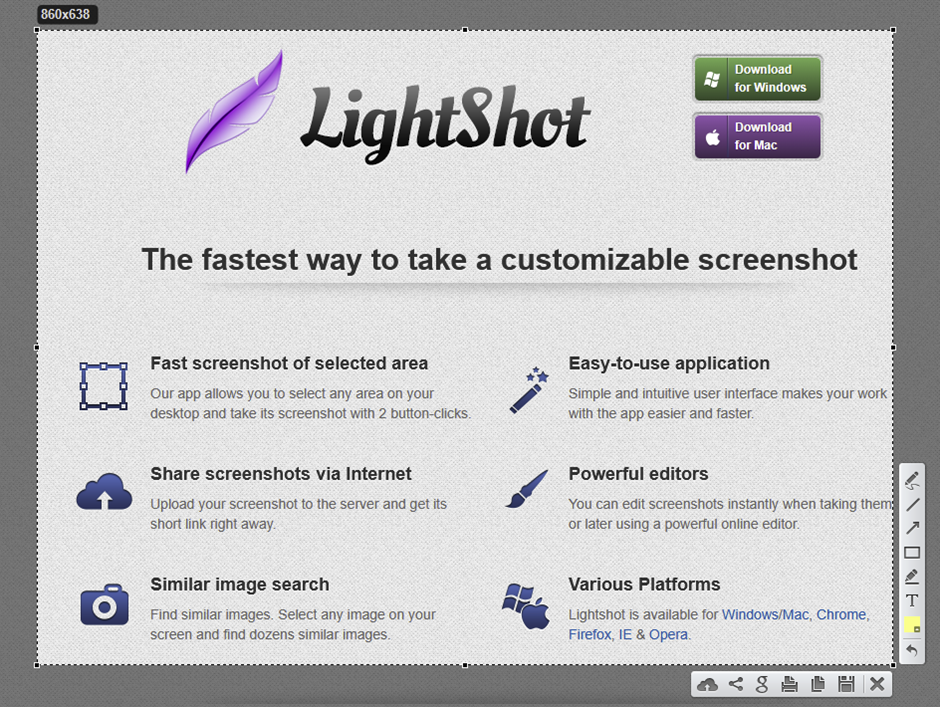
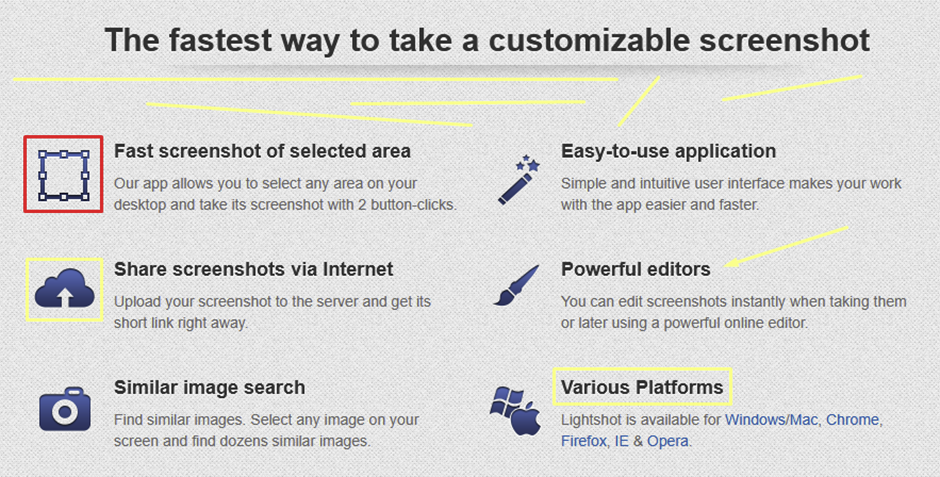
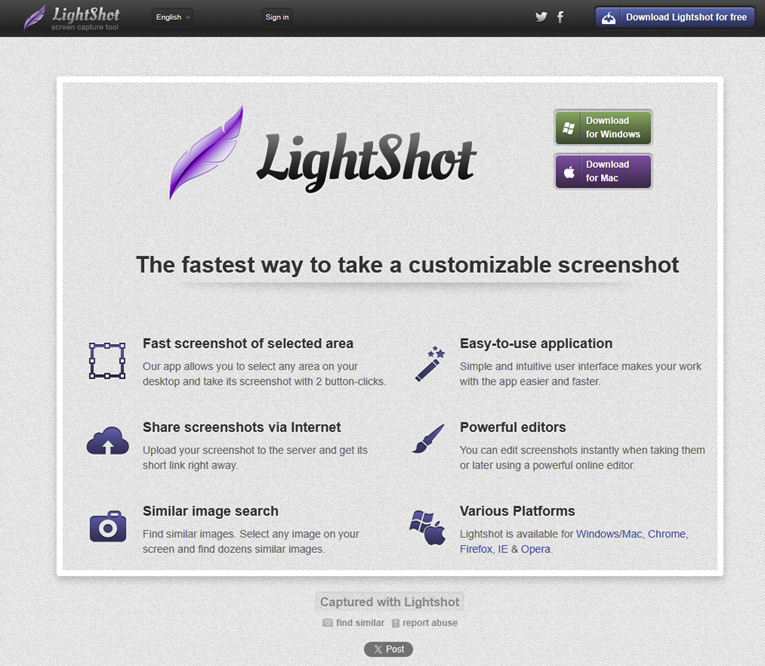
Lightshot is a free and lightweight screenshot software developed by Skillbrains. It enables users to quickly capture any part of their screen, edit it instantly, and share it online using a generated link. It is widely used in programming, Python, and web development environments for quick visual communication.
Unlike traditional tools such as Snipping Tool, Lightshot focuses on speed, simplicity, and seamless sharing.
It is widely used by content creators, developers, SEO professionals, and customer support teams.
How Lightshot Works
This program is one of the best alternatives to the standard Windows Snipping Tool. While the built-in tool is enough for basic screenshot capturing, it lacks advanced editing features. If you need to add shapes, insert text, or make quick corrections, tools like Lightshot are a better choice.
You can download it from https://app.prntscr.com/en/. Once installed, you can use all its features easily. In this guide, we will explain each feature step by step.
Windows Installation
- Download from the official website
- Install the executable file
- The Print Screen (PrtSc) key becomes the default trigger
macOS Installation
- Install using the .dmg file
- Move to Applications
- Assign a shortcut if needed
Browser Extensions
Lightshot is also available for:
- Google Chrome
- Mozilla Firefox
These extensions allow direct webpage capture.
Selecting screen
We will focus on using this program on Microsoft Windows, as it is the most widely used operating system. Therefore, this tutorial will be especially useful for Windows users.
To quickly capture a specific part of your screen, press the Print Screen (PrtSc) key and select the area you want to screenshot.
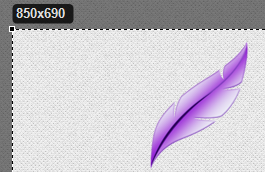
For certain tasks, knowing the screenshot dimensions (width and height in pixels) is important. After completing your selection, Lightshot will display a screen like the one shown below.
To cancel a screenshot selection in Lightshot, press the Escape (Esc) key on your keyboard.
Using the selection handles (grips), you can adjust the size or modify the selected area by removing or adding parts. This is very useful compared to Snipping Tool, where you need to be much more precise during the initial selection.
Core Features Explained
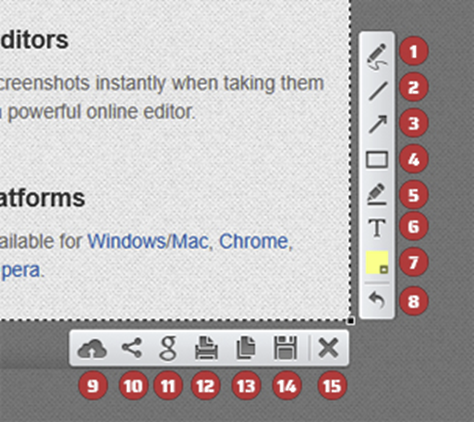
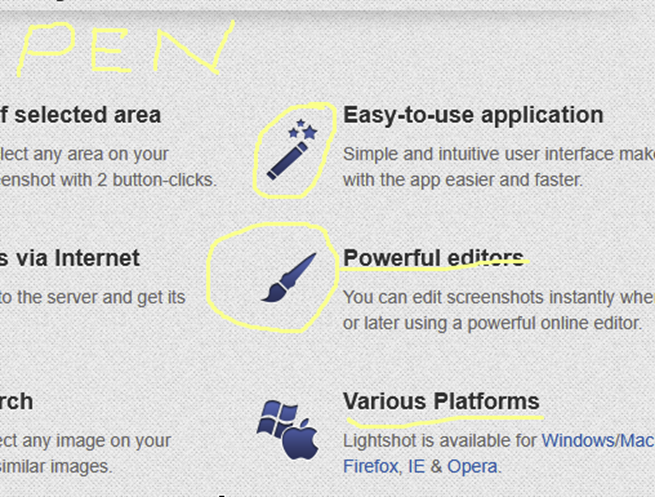
Pen (1)
Lightshot’s drawing tool is intended for quick annotations and simple shapes, not precise design work. For accurate lines and shapes, additional tools or software may be required.
Color can be changes in point 7.
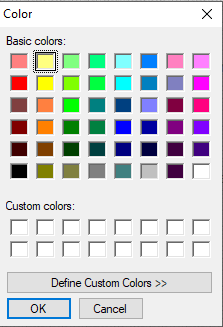
It basic color selection tools. If you want you can select using Define Custom Colors.
You can take a screenshot and then edit it in online tools or in Adobe Photoshop if you need more advanced features.
Line (2), arrow (3) and rectangle (4)
The program includes simple tools for drawing lines, rectangles, and arrows. To create perfectly horizontal or vertical lines, you need to be very precise, as Lightshot does not support using Ctrl or Shift keys to constrain angles to 90° or 180°.
Previously added elements can be undone (up to several steps), but they cannot be edited once placed. If you need to make changes, you must undo the action and draw the element again.
Additionally, only basic shapes such as rectangles are supported. Lightshot does not provide options for drawing circles, polygons, or other advanced shapes.
Overall, these tools are designed for quick annotations rather than precise design work. For more accurate shapes and advanced editing, it is recommended to use external tools such as Adobe Photoshop or similar image editors.
Highlighting (5)

Lightshot includes a basic highlighting tool that lets you choose colors, but it does not support adjusting the pen thickness or size.
Text adding (6)
Lightshot provides a basic text tool that allows you to add text with a selected color. However, it does not support editing, resizing, or formatting the text after it has been placed.
Uploads to prntscr.com (9)
This feature allows users to upload files and even handle large files using basic compression through cloud storage. By clicking this option, the selected area will be uploaded to the program’s server, and you will receive a URL to share or access it later. The program’s website does not specify how long these images are stored in the cloud.
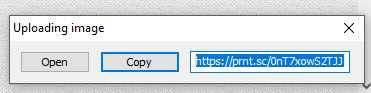
When you open the generated link, the selected screenshot will be displayed as an image.
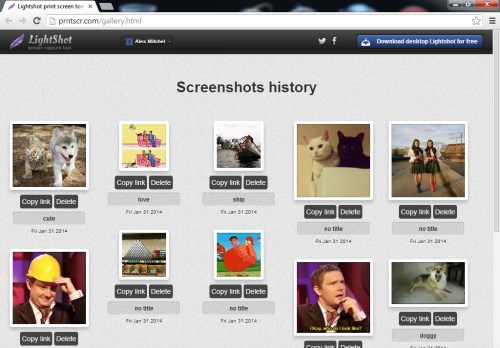
After signing in, all your uploaded screenshots will appear in your account dashboard, like in the next picture. From there, you can manage them by copying links or deleting screenshots.
Sharing possibility (10)
In today’s internet-driven world, it is almost impossible to imagine life without social networks and sharing. Therefore, sharing functionality has become one of the most important and essential features in modern applications.
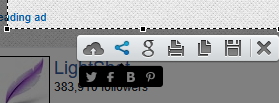
As you can see, the program provides the ability to share the selected area via X (Twitter), Facebook, Blogger, and Pinterest.
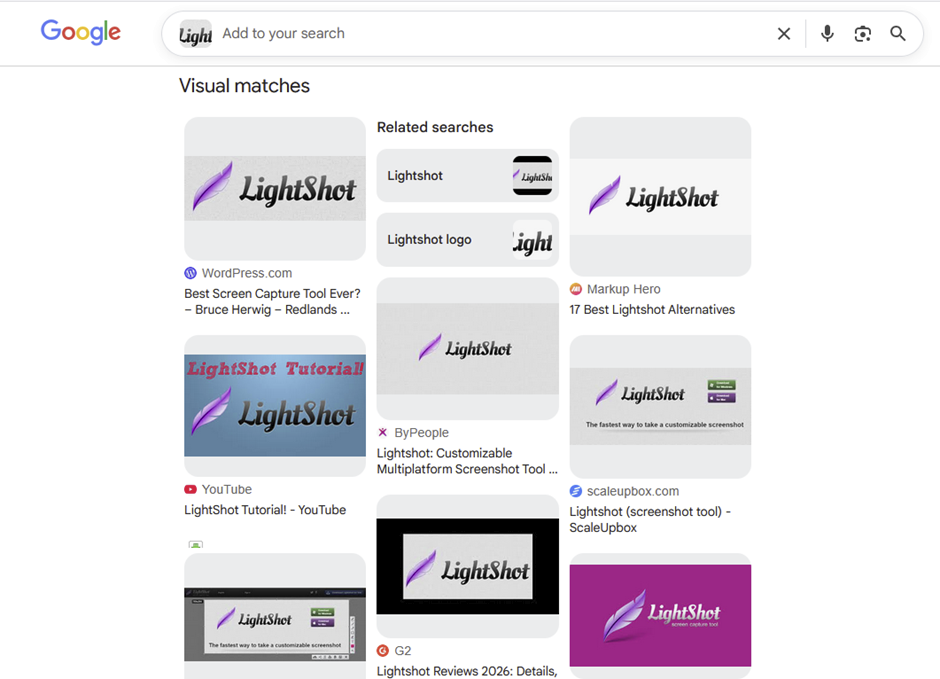
Search similar images on Google
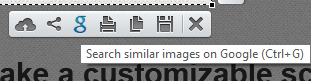
The selected screen will be copied to the clipboard, and you will be redirected to Google Images for image search.
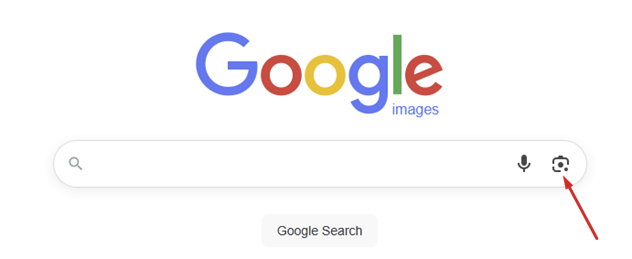
Click on the arrow icon to open Google Lens.
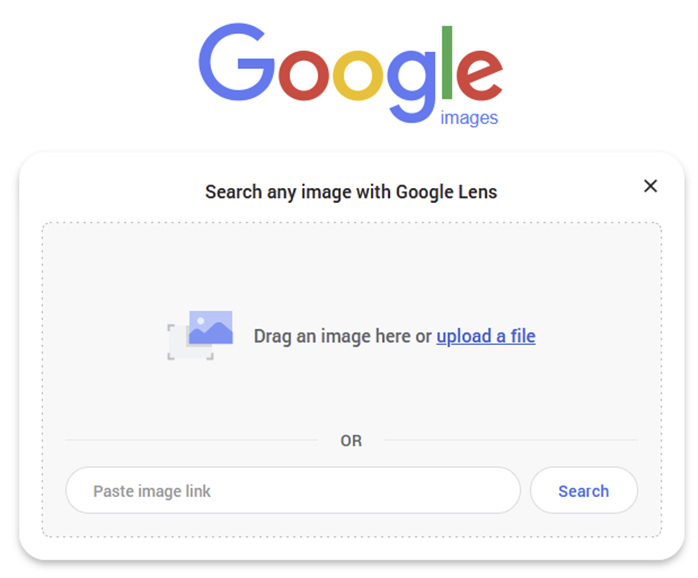
You can simply press Ctrl + V to paste the image from the clipboard and perform a search.
Save and Export Options
If you use the save option by clicking the Save button, a window will appear prompting you to save the file on your PC. You can save the screenshot in the following formats: PNG, JPG, and BMP. Users can choose the most suitable format depending on their needs.
Advanced Usage
Productivity Workflow
Lightshot integrates well with tools such as:
- Microsoft Word
- Slack
- Notion
You can quickly capture and paste screenshots into documents or chats.
SEO and Content Creation
- Capture search engine results pages
- Annotate keyword placement
- Share visual reports with clients
Development and Debugging
- Capture bugs instantly
- Highlight UI issues
- Share with development teams
Privacy and Security Considerations
Important points to consider:
- Uploaded screenshots are publicly accessible
- No password protection is provided
- Links can potentially be discovered
Best Practices
- Avoid uploading sensitive data
- Use local save for confidential content
- Double-check screenshots before sharing
Advantages and Disadvantages
Advantages
- Fast and lightweight
- Easy to use
- Free
- Instant sharing capability
- Cross-platform support
Disadvantages
- Limited advanced editing features
- No screen recording
- Privacy concerns with public links
Comparison with Alternatives
Lightshot vs Snipping Tool
| Feature | Lightshot | Snipping Tool |
| Speed | Very fast | Moderate |
| Editing | Built-in tools | Basic |
| Sharing | Instant link | Not available |
| Cloud support | Yes | No |
Lightshot vs ShareX
| Feature | Lightshot | ShareX |
| Ease of use | Very simple | Advanced |
| Features | Basic | Extensive |
| Automation | No | Yes |
| Target users | General users | Power users |
Best Use Cases
Lightshot is ideal for:
- Bloggers and writers
- Developers and designers
- Technical support teams
- SEO professionals
- Students and educators
Final Verdict
Lightshot is one of the most efficient tools for quick screen capture and sharing. Its strength lies in its simplicity and speed rather than advanced functionality.
For everyday use, it remains an excellent choice. However, users who require more advanced editing or stronger privacy controls may need alternative tools.